Best cameras for beginners: 5 stellar interchangeable lens cameras you can grow with

Upgrading from a ‘phone, compact or bridge camera to an interchangeable lens camera is an exciting move that takes your photography to a new level, enabling you to take greater control and produce higher quality images.
Choosing the right model to go for isn’t easy as there are lots of options available. Ideally you want something that keeps things simple and doesn’t intimidate at the outset, but that gives you everything that you’ll need further down the line when you know a bit more about photography.
In this article we take a look at some great cameras, SLRs and compact system or mirrorless models, that fit the bill.

Best cameras for beginners: 01. Canon EOS 100D/Canon EOS Rebel SL1
1. Canon EOS 100D/Canon EOS Rebel SL1

Billed as the World’s smallest SLR when it was announced, the Canon 100D is significantly smaller than Canon’s other APS-C format SLRs.
Nevertheless, it has a chunky grip and a mode dial to allow quick exposure mode selection with the enthusiast favourite options (aperture priority, shutter priority and manual) finding a place alongside fully automatic and scene mode options for less experienced users.
There’s also Canon’s Creative Auto mode which helps novices take control over the camera without using photographic terms.
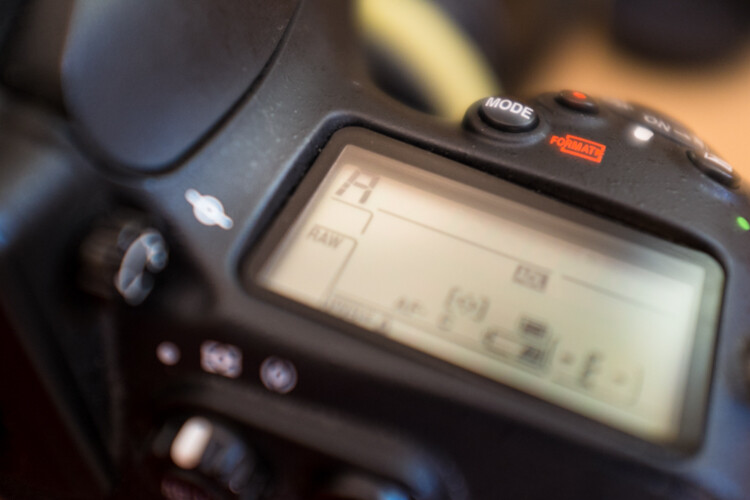
Like the D3300, the 100D makes heavy use of the screen for setting selection.
However, the 100D has the advantage of touchscreen technology so you have choice of using physical controls or tapping the screen to navigate and select the options.
Many will find touch-control more intuitive, especially those used to using a smartphone for their photography.

Best cameras for beginners: 02. Nikon D3300
2. Nikon D3300

Nikon’s D3X00 line of SLRs is one of the most popular options for novice photographers and the latest incarnation, the D3300 is a real cracker.
One of its most attractive features for those learning about photography is the Guide Mode in which the camera takes the user through the step-by-step process of selecting settings to shoot a variety of subjects.
In addition, the D3300 has a class-leading pixel-count of 24.2million and this, coupled with the EXPEED 4 processing engine and the (APS-C format) sensor’s low-pass filterless design enables it to resolve an impressively high level of detail.
Rather than being covered in numerous buttons and dials, the D3300 has quite a clean appearance and the many settings selection settings are made via the menu and Graphic User Interface on the 3-inch 921,000-dot screen.
The camera can display three circles that represent shutter speed, aperture and sensitivity to help convey the exposure settings.
The D3300 is an excellent camera and like all the others mentioned here has automatic exposure modes for the early days, as well advanced options for when you’ve grown in experience.

Best cameras for beginners: 03. Canon EOS 700D/ EOS Rebel T5i

3. Canon EOS 700D/ EOS Rebel T5i

The 700D/T5i sits at the top of Canon’s consumer range, just below the Canon EOS 60D which gets ‘enthusiast-level’ billing.
Like the Canon 100D, the 700D has an APS-C sized CMOS sensor with 18 million effective pixels and phase detection pixels to assist with focusing when shooting video or composing images on the screen in Live View mode.
There’s also the same collection of JPEG-only Creative Filters (Grainy Black and White, Soft Focus, Fish-Eye, Art Bold, Water Painting, Toy Camera and Miniature Effect) which can be previewed in Live View mode.
While it may not have the pixel-count of the D3300 or the tiny size of the 100D (though it is by no means huge), the 700D has a vari-angle touch-sensitive screen.
This is a real bonus when composing images from awkward angles as it can be articulated to point where it is visible and the AF point can be set with a tap of the screen.
And of course, it’s capable of producing superb images with plenty of detail, good exposure and rich colours.

Best cameras for beginners: 04. Panasonic Lumix DMC-GM1

4. Panasonic Lumix DMC-GM1

If you want a small camera with a decent sized sensor that accepts interchangeable lenses then take a look at the Panasonic GM1.
It’s about the same size as many compact cameras but it has a superb Four Thirds sensor.
What’s more, because it has the Micro Four Thirds (MFT) mount it can accept any of the now extensive range of MFT lenses from Olympus and Panasonic.
Even though it’s small the GM1 doesn’t skimp on features and it has Wi-Fi connectivity built-in to allow remote control of the camera via a smartphone or tablet as well as wireless image transfer.
Like the SLRs mentioned here, this Compact System Camera (CSC) allows images to be save in raw or JPEG format (or both simultaneously) and there’s Full-HD video recording.
On the back of this metal-bodied beauty is a 3-inch one-million-dot touchscreen which enables quick settings adjustments.
That doesn’t mean that there are no buttons and dials, however. As well as the usual shutter release, navigation pad, menu button, playback button and movie record button, there’s a mode dial for setting the exposure mode and a dial for switching between focus modes.
Meanwhile there’s a scoll-wheel for adjusting exposure.
Panasonic also hasn’t skimped on image quality from the GM1 as it produces photographs that are on a par with models higher up the G-series like the GX7.

Best cameras for beginners: 05. Panasonic Lumix DMC-G6

5. Panasonic Lumix DMC-G6

If you’re looking for a relatively small camera that has lots to offer, check out the Panasonic G6.
This 16.5Mp Micro Four Thirds compact system camera has mini-SLR like styling, but because the high-resolution viewfinder is electronic you see the image as it will be captured with the selected camera settings.
There’s also a vari-angle LCD for composing images at awkward angles and, because it’s touch-sensitive, it can be used to adjust settings, select AF point and even fire the shutter.
If you prefer to use physical controls, there are plenty of these available as well.
Like the GM1, the G6 has Wi-Fi connectivity built-in for speedy image sharing and wireless remote control, but there’s also an NFC chip to make quick connections to NFC enabled tablets and smartphones.
While the G6’s pixel count means images are significantly smaller than those from the Nikon D3300, their quality is generally excellent.

Next Level Techniques for Advanced Beginners

Aperture priority settings

You’ve been bitten by the photography bug – it’s not an actual insect, but you know what I mean.
Andreas.
By Andreas.
After the salesman pried that hard-earned money from your hands, you brought home that tantalizing-looking DSLR and your friends looked at it like it was a dangerous alien device, inquiring what all of those buttons, dials, and switches actually do.
At the time you didn’t really even know what they did, but you did know that once you figured it out, some cryptic combination of clicking knobs, pushing buttons and twisting rings on that lens, you were going to produce some knock-out photos.
Since then, you have spent eons of your life that you will never get back reading and researching on Digital Photography School, and highlighting juicy passages in your camera’s user manual (that last part might not be true). And guess what? It’s paid off!
Now you know how aperture affects depth of field, how to use shutter speed to freeze or blur movement and that once mysterious acronym, ISO, finally means something to you. Looking back you now understand what it is like to be a beginner, and that realization alone has raised you to a new level.
JD Hancock
By JD Hancock
What now? You are getting some shots you are proud of, have a pretty firm grasp of the fundamentals and are ready to take it to the next level. You are ready to learn some new techniques, emerge from survival mode and get out there and photograph with intention.
Let’s take a look at some techniques that just might get you over that hump and give you the skills, knowledge and power to capture great photos consistently.

Understanding and Using Aperture and Shutter Priority Modes

These are features that the vast majority of DSLRs have, and even many point-and-shoot cameras on the market as well. Some purists may balk at the thought of using one of these “automatic” settings, but pro shooters have long ago learned the versatility and usefulness of these controls.
Aperture priority gives you full control of aperture while your camera takes care of the rest.
Although the various options for these settings may vary between manufacturers and camera models, the basic premise remains the same.
As the name suggests, these settings are pseudo-automatic. However, unlike the Program (P) setting, which does allow a minute amount of influence from the shooter, Aperture and Shutter Priority modes let you set certain parameters that change automatically to compensate for other adjustments that you remain in control of.
For instance, if your camera is set to Aperture Priority you retain the ability to adjust the Aperture to alter the depth of field as you see fit, and in conjunction with ISO, the camera will automatically choose the corresponding shutter speed for correct exposure. Many cameras give you the option to control ISO manually or let the camera adjust it for you.
The Shutter Priority setting does what you would expect, allowing you to control the shutter speed while the camera does the heavy lifting of setting the appropriate aperture.
Thomas Hawk
By Thomas Hawk
Some cameras offer the option to set limits on the extent of certain settings. For example, if you are shooting in aperture priority, you can set the camera so the shutter speed won’t drop below a predetermined speed or the ISO won’t exceed a maximum level.
My camera is set to Aperture Priority more often than not – this is personal preference. I know my camera like the back of my hand, and can anticipate how all the settings correspond to one another, so I feel comfortable using this setting under most conditions. It is certainly important to be comfortable using your camera in Manual Mode, however, you are likely to find that once you become accustomed to Aperture or Shutter Priority modes, you will have enough control without having to spin dials as much. Priority modes also help prevent accidental changes which can result in improper exposure.

Exposure Metering, Exposure Lock, and Exposure Compensation

A*J*P
Vintage exposure meter – By A*J*P
While we’re on the subject let’s look at some other ways that you can work with your camera to get proper exposures in all sorts of conditions.
DSLRs give you a few different options as to how they meter and determine exposure for a given scene. The most common are spot, center-weighted and evaluative or matrix metering. Take a look at this handy cheat sheet that should help you wrap your mind around the concept.
Fancy technicalities aside, what are the practical applications of these different settings?

Spot metering

Since spot metering bases exposure on the reading from a very small area of the image, it is a great choice if the subject of your composition is small and significantly lighter or darker than the rest of the image, so you can hone in on the correct exposure. This metering mode can be useful for small backlit subjects, as the light source shining directly at the camera will most often result in an underexposed subject. Keep in mind that regardless of the type of focus points you are using, spot metering will read only about a 4mm radius (depending on the camera) from the very center of the focus point.

Center-weighted metering

Center-weighted metering takes the whole frame into consideration, but puts more value towards the center of the focus points (somewhere in the 12mm range). This setting works great when your subject takes up a larger part of the frame, or the lighting is more even. Consider a close-up portrait where spot metering might be too specific if it reads a shadowed or highlighted area, but center-weighted would give you more of an average.

Evaluative or Matrix metering

The last of three main metering types, evaluative (Canon) or matrix (Nikon) metering, determines exposure in a more complex way by taking into account composition, tones, color and some cameras can even factor in the distance objects are from the camera to estimate what the main subject is. This system of metering works great for landscapes and wide angle shots.
Many cameras are equipped with a dedicated exposure lock button or have customizable settings in order to delegate one. This is used when you want to take an exposure reading and hold it. If your subject fills a large part of the frame, the camera may do a good job at setting exposure. If the subject takes up only a small part of the frame, you can move in close to get an exposure reading, lock exposure and recompose the image.
Exposure/focus lock button
Once you familiarize yourself with the exposure/focus lock button, you will be surprised how often you use it.

Exposure compensation

Exposure compensation allows you to over or underexpose the image manually. This is most useful while using automatic or semi-automatic settings like Aperture or Shutter Priority. In the example of a backlit portrait, many photographers prefer to overexpose the camera’s suggested exposure, knowing that the reading will be wrong because of the lighting. You could certainly change your exposure metering to try and secure a more accurate reading, but with experience you can easily predict how the camera’s exposure meter will react ,and use exposure lock or exposure compensation as a more direct, and one-off, route to proper exposure.
Just keep in mind that the most challenging conditions for your camera’s exposure meter are high contrast situations, and with enough experience you will learn to “see” like your camera and easily be able to anticipate necessary compensations.

Selecting Different Focus Settings

To start with, there are two main categories of autofocus settings: Single and Continuous.
Single (One Shot on Canon) is intended for stationary subjects. When the camera finds focus in single servo mode, it holds that focus point until the shutter is released or the autofocus is released and re-activated.
However, single servo focusing can be very useful for action in certain applications. For example, one technique when shooting a moving, yet predictable subject, is to compose the image and lock focus on the spot where you know your subject will be, and wait for it to enter the frame (think panning).
In continuous focus mode, your camera will continually refocus while the autofocus is engaged. This is the setting to use if your subject, or you and your camera, are on the move. In continuous mode, many cameras allow you to choose how many focus points are live. Say you are shooting a sporting event and there are a lot of players, you may want to use fewer focus points in order to single out your subject.
Continuous servo autofocus
Continuous servo focusing is best used to maintain focus on moving subjects – especially if they are moving towards or away from you.
It’s also worth mentioning that just in case you haven’t figured it out already, you can move the focus points around the frame in the viewfinder with the multi-selector. This is key while trying to maintain a certain composition with a moving subject. Consider some basic compositional conventions such as the rule of thirds when setting your focus points for a shot.

Confirm Focus by Previewing Images at 100%, In-camera

As a digital photographer you are extremely fortunate to have access to a feature like this –film shooters didn’t/don’t have this luxury.
The concept is simple: if you are unsure whether you nailed a sharp image, due to camera shake or shallow depth of field, zoom in to 100% and do a little pixel peeping for confirmation. Make a habit of doing this instead of ending up in front of your computer in disappointment at a great shot that’s not sharp.
Zoomed to 100% in camera
Zooming to 100% is a quick way to confirm you have a sharp image.
Some cameras (check your user’s manual to see if your camera supports this feature) allow you to customize a button which zooms directly to 100% for this purpose.
Many cameras have a setting (sometimes called shutter release priority) which won’t allow a picture to be taken unless it recognizes that your focus point is actually in focus. Personally, I loathe this setting. I think it is better to take your chances and at least try to get the shot. Although the focus may not be spot on, you still may get a usable image.

Conclusion

These are just a few of the major technical considerations to keep in mind as you bravely forge ahead in your photographic pursuits.
Every situation requires its own approach, and the more tricks you have up your sleeve, the more prepared you will be to nail the best shots. Keep your nose to the grindstone and embrace the challenge!
Do you have any other tips for the advanced beginner? Please share in the comments below.

21 Settings, Techniques and Rules All New Camera Owners Should Know

Some are very basic while others go a little deeper – but all have been selected from our archives specifically for beginners and new camera owners. Enjoy.

Introductions to Useful Modes and Settings on Your Digital Camera

Photography Settings, Techniques and Rules
1. Digital Camera Modes Explained – I spoke with a family friend recently who had just bought a new point and shoot camera. She came up to me with her camera when no one was watching and embarrassedly asked me if I could tell her what all the little icons on the dial on top of her camera meant. This article explains what each of these most common digital camera modes means and does. Knowing them can take your shots to the next level.
2. Aperture and Shutter Priority Mode – this introduction talks you through these two very useful settings that can be found on many digital cameras. Aperture and Shutter Priority modes take you out of Automatic mode giving you more control over your images – but don’t thrust you fully into manual mode – they are great settings to explore and master.
3. Introduction to White Balance – one of the most common problems that I see in beginner photographer images are shots with incorrect color. We’ve all seen them – portraits where your subjects teeth and eyeballs (and everything else) has a yellowish tinge. Learn what causes this and how to combat it with this tutorial on White Balance.
histogram.jpg4. Understanding Histograms – ‘histograms are scary’ – this is what one reader said to me recently when they discovered that they could view these little graphs or charts on their camera. While they might seem a little technical it is amazing how simple a histogram is to interpret. Know what you’re looking for and with just a glance you’ll know if your image is under or over exposed. It’s a useful tool to master.
5. Automatic Exposure Bracketing (AEB) – this feature is another of those often unexplored settings that many cameras have built into them that will allow you to get well exposed shots in even the trickiest of lighting situations.

Other Basic Camera Techniques

How to Hold a Camera
6. How to Hold a Digital Camera – this beginner tutorial covers a topic that most camera owners skip over without realizing that it is a foundational lesson in photography. Get this wrong and it can impact the quality of your shots.
7. Shutter Release Technique – another ‘basic’ or ‘beginner’ type tip that many do intuitively – but which can drastically improve your photography if you don’t do it.
8. How to Use Focal Lock – yet another beginner technique that many of us take for granted yet which is at the core of how all digital cameras focus automatically. Get this wrong and you’ll take a lot of shots of out of focus subjects and in focus backgrounds!
9. How to Take Sharp Digital Images – ‘my shots are fuzzy’ – it’s a common problem that we’re asked about at DPS so we wrote this tutorial to refer people to to help them get the sharpest images that their camera can take.
10. Shooting with an In Camera Flash – flash photography with an in built flash can lead to some terribly blown out images – here are a few tips on how to avoid them. On a similar topic – here’s7 Strategies for Avoiding Flash Blow Out.
11. How to Get Shallow Depth of Field in Your Digital Photos – a great technique to learn if you’re into many types of photography (portraits, macro etc) is how to control the depth of field in your shots and make your main subject ‘pop’ out by making your background nicely blurred – this tutorial talks you through how to do it.
12. Understanding Exposure – this post talks new camera owners through the three main elements of Exposure. Once you’ve read it also check out our introductions to ISOAperture andShutter Speed.

Camera Care and Maintenance

camera care
13. How to Avoid a Dirty DSLR Sensor – one of the fastest ways to ruin every single shot you take with your new DSLR is to end up with a dirty image sensor. This tutorial gives some basic tips on how to ensure it stays as clean as possible.
14. How to Clean a DSLR Lens – as much as you try to protect them – lenses tend to get a little grimy over time. This tutorial shares some basic tips on how to clean them up so that your shots will be as clear as possible.
15. 7 Digital Camera Predators and How to Keep them at Bay – this tutorial talks you through 7 of the most common ways that digital cameras get damaged – what to look out for and what preventative action to take to avoid them.

Composition Tips

rule of thirds
16. The Rule of Thirds – whether you know it to follow it or break it – it’s something you should at least know about.
17. Points of Interest – an image without some visual point of interest in it is unlikely to hold the eye of anyone viewing it.
18. Getting Horizons Horizontal – the perfect way to ruin that lovely sunset or landscape shot is to make it lean to one side. Get your Horizon Horizontal!
19. Fill Your Frame – this is not applicable to every shot you take but many photographers could drastically improve their photography by getting in close to their subject and filling their frame.
20. Getting Backgrounds Right – the background of your shot can make or break your image. This tutorial talks you through a number of things to look out for and techniques to use to get them just right.
21. Adding Randomness to Your Photos – learn how to set your images apart from everyone else’s by injecting creativity, variety and a little randomness into your shots.

Best camera clips for photographers: 5 top options tested and rated

Stop missing shots because your camera’s out of reach. We test five of the best camera clips available to see how well they keep your camera ready for action.
Best camera clips for photographers: 5 top options tested and rated

Best camera clips: 01 B-Grip Uno

£36/$55
This little gadget lets you carry your camera on a regular belt or a bag strap, and attaches easily to either. The clip is comfortable on the go. Although predominantly plastic, it’s built to last. Only a fiddly release clamp lets it down.
www.bgrip.com

Best camera clips: 02 Lowepro S&F Light Utility Belt & Toploader Pro 70 AW II

Best camera clips: 02 Lowepro S&F Light Utility Belt & Toploader Pro 70 AW II

£54/$60 & £79/$90
Combining a camera utility belt and holster bag keeps you comfortable and your camera protected from the elements. The Toploader Pro 70 holster is big enough for a pro SLR, but consequently it’s far from sleek, and access can be slow.
www.lowepro.co.uk

Best camera clips: 03 Peak Design Capture Pro Camera Clip

Best camera clips: 03 Peak Design Capture Pro Camera Clip

£60/$80
Like the Uno, the Capture Clip fastens your camera to your belt or bag strap, however the Capture’s quick release system is slicker. It’s great with a CSC or a light SLR, but anything heavier will feel like it’s pulling your jeans down!
www.peakdesign.com

Best camera clips: 04 Spider Pro Single Camera System

Best camera clips: 04 Spider Pro Single Camera System

£110/$135
The Spider Pro is a joy to use, thanks to its instant camera access. Forget bags, clips and clamps: here you get a beautifully designed ball joint that simply slots into a holder on a comfortable belt. The Spider’s impeccable build quality seals the deal.
www.spiderholster.com

Best camera clips: 05 Think Tank Steroid Speed Belt V2.0 & Digital Holster 20 V2.0

Best camera clips: 05 Think Tank Steroid Speed Belt V2.0 & Digital Holster 20 V2.0

£49/$63 & £55/$70
Here’s another belt and holster bag combination, but both elements are more streamlined and convenient than the Lowepro pairing. Size-wise, it’ll pack a small SLR up to a 6D or a D610, but an expandable base enables you to fit a reasonably long lens.
www.snapperstuff.com

This Horrifying Fake Camera Cleaning Tutorial Will Probably Give You Nightmares


The video is not for the faint of heart. Heck, even the not-so-faint of heart will probably have trouble with it. A FAKE (not sure how much more we could emphasize this) tutorial, it shows you ‘how to clean your 5D Mark II and lens’ … and by clean we mean destroy.
He starts by submerging the camera and lens completely in water, and then, in case your eyes haven’t popped completely out of your head and you haven’t gone hoarse yelling at the computer screen just yet, he pours some dish soap in there and proceeds to vigorouslyscrub the inside of the camera with his finger.
Finally, he then takes a spray hose, sticks the nozzle right up next to the sensor, and sprays it full blast.


It’s like watching a photographic car wreck. You know it’s happening, you know it’s terrible, and you’re horrified… but you just can’t look away.
And while it goes without saying, we’re going to say this here in case anybody who actually thought the iOS 7 update made your iPhone waterproof is reading this: THIS IS A FAKE TUTORIAL. From start to finish, doing anything resembling this to your camera will very likely destroy it.
Now go give your DSLR a hug.

CANON EOS-1D X MARK II

EOS-1D X Mark II in Final Preproduction Form

We’re told in our FANPAGE that CANON EOS-1D X Mark II is now in its final preproduction form. The camera is currently being used by various photographers around the globe for marketing material.
No specifications have leaked out yet, but the camera appears to be arriving quite soon.
I wish we could say more, but stay tuned…

Sources : www.NOMFilms.com

CANON EOS 6D MARK II (Canon 2016)

CANON EOS 6D MARK II (Canon 2016)

Finally we have some news about the Next Canon DSLR camera : Canon EOS 6D MARK II 

The EOS 6D Mark II will be announced after the EOS 5D Mark IV started shipping (this is not entirely new since it was already murmured on the web). we also got some specs:
  • 28MP
  • 6 fps
  • ISO 100 – 102400 (expandable to 204800)
  • new AF system (but not the same as on 5DS)
  • 98% viewfinder coverage
  • Single SD card slot
  • WiFi, NFC, and GPS
  • small improvements for video features
Contrary to a previous rumor that was floating around some weeks ago, suggesting the EOS 6D2 will have a 24MP sensor, our source stated that it will be a 28MP sensor. The source said that Canon will not sell a full-frame DSLR with the same pixel count as Canon’s latest Rebels. The source was a bit confusing about the auto-focus system, saying that it will not be on the same level as the AF system featured on the EOS 5DS and EOS 5DS R. Still, it is not clear to me what kind of AF is coming. For sure there will be a step forward compared to the 6D, but given the fact the EOS 6D Mark II will be an entry-level DSLR, it won’t probably be a the most advanced AF system. I guess Canon will recycle one of the AF system they already feature on some of their DSLRs.
 It’s still early for reliable EOS 6D Mark II rumors. However, this is one of the not so weird 6d2 rumors we had so far. We heard pretty amusing things, like that Canon isn’t satisfied with the EOS 6D sales figures, and will hence move the 6D2 upmarket (which is absurd, the 6D was and is a best seller). The source stated clearly that the EOS 6D Mark II will be an entry-level FF DSLR, exactly like its predecessor. The pricing should be around $2,100, same as the 6D when it was introduced.
The EOS 6D was released in November 2012. Stay tuned….
FANPAGE : https://www.facebook.com/NOMFILMS